This is my second tutorial on this topic, the first covered the whole creation process to the finished result, this tutorial will be focusing on
taking the finished content and getting it into FoFix, this will cover notes and frets and potentially any other 3d content for the game.
If you are not at this stage then you may want to check out the first tutorial then come back to this, Tutorial 1.
This tutorial is aimed at Max users, specifically 2009 SP1, the process is a little dodgy in places but it gets results.
First I need to credit Blazing Gamer for his work on the 3D side of FoFix fixed up to enable some great content that wasn't possible
before, and second Modda for his tutorial and sample file, this made getting to grips with FoF a lot easier saved me hours of messing
around, check out the page here.
[ BACK TO TOP ]
3D Studio Max 2009 SP1
Photoshop
ColladaMax v3.05B for 2009
Python 2.5.4
Blender 2.48a
Note Reference (max 2009)
Bass Note Reference (max 2009)
Fret Reference (max 2009)
[ BACK TO TOP ]
Install python first, then blender otherwise it'll moan, ColladaMax is a seperate plugin to save out FoF compatible
dae files, unfortunatly the uvmapping does not seem to work so we use blender to resave to get the uvs fixed.
The ColladaMax plugin seems to want to replace a bunch of Max files, I did not like the idea of this so just popped the
plugin file in the max plugin folder and left the rest, this potentially could be causing issues but I don't want to mess
with my Max install so this is the way im going to do it untill theres a better exporter for 2009.
The reference files are there so you can duplicate the orientation and scale etc, the fret buttons are aligned differently
so I made a seperate file for those.
[ BACK TO TOP ]
So at this point everything should be installed and ready to go, load up Max and open your 3D note / fret, clean up the file, delete
any reference images, wip model parts laying around so you just have exactly what you want to export and save.
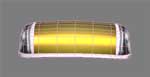
Now load up one of the reference files and then merge your newly saved file into the scene.
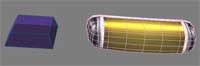
Scale and align your model to fit the reference. From my inderstanding of the Fofix requirements for a 3D file, it currently
supports 4 mesh objects and 1 light, the 4 meshes named Mesh, Mesh_001, Mesh_002, Mesh_003
and an omni light Omni_001. Mesh_002 and Mesh_003 along with the light are optional.
For a standard note Mesh = normal note, Mesh_001 = hopo version of the note, these are both stored inside the same file
so if you have the hopo made merge that into the scene as well and scale and align just like you did with the normal note.
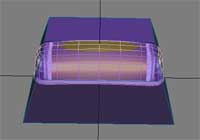
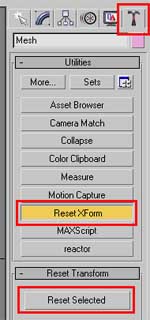
Delete any unwanted objects from the reference file, then select your meshes and go to the utilities tab and select Reset XForm
and click reset selected.
Now convert all the meshes back into a poly object to collapse the stack and bake everything in.
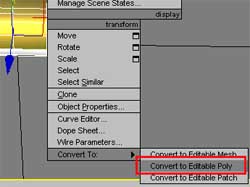
NOTE: if your mesh turned black or looks to be inside out your normals have probably screwed up so just apply a normal modifier to the mesh
to fix it, then collapse the stack again.
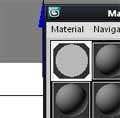
One final step is to remove the texture material from the mesh, so far I have found any notes I have exported with the texture still assigned
to the mesh when exporting it will crash FoFix. Just replace with a default material or set one up as mentioned in Modda's tutorial, for
ease I have included his material inside the reference file so you can just bring up the material editor and assign this to your meshes.
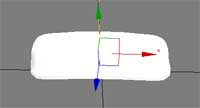
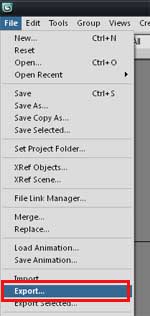
Now you should have everything ready to export, go to file > export and find collada from the file type list, do not use autodesk collada as this
will not work.
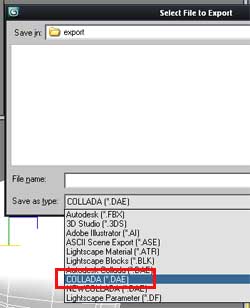
If you are saving out a normal note call it note.dae, if you are doing fret buttons these are saved out as 3 seperate files,
key.dae = default position, key_hold.dae = pressed fret and key_hit.dae = note hit position, and drum notes currently share
the same files as the normal notes, other than the bass note which is called open.dae (reference file for bass note added
to the downloads at the top to get correct scale).
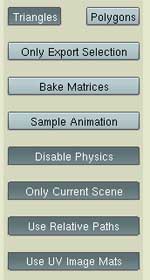
The next step is to set the export settings, typically this usually just means unticking the animation box but for reference just
change the settings to match these.
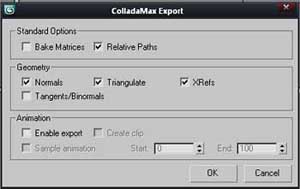
If you like you can now shove these files into Fofix if you want a quick preview with screwed uvs just to confirm the mesh is correct.
Also worth noting the hopo and normal note share the same texture, so you may need to adjust your uv mapping to ensure you do not have
conflicting uv space.
[ BACK TO TOP ]
Now I have never used Blender previously so all I know is enough to get things working. If you forgot to install python 2.5 nows the time to do so.
Open Blender and go to the file menu, import and select Collada 1.4
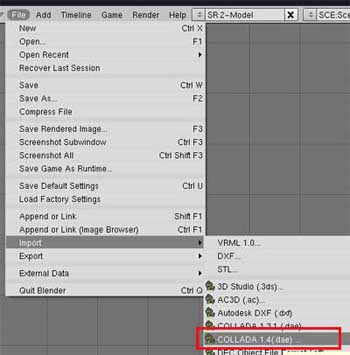
Use the browser to find your dae files and hit enter. Make sure the New scene option is selected and click import and close.
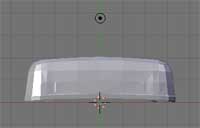
You should now have your model displayed in the viewport, you can use the middle mouse button and wheel to rotate and zoom the viewport to get
a better look, shift + middle mouse to pan, ctrl + middle mouse to zoom.
Now the import into blender has caused a couple of complications, smoothing groups have been lost, and it renames your files
for some reason. To get your mesh names back select a mesh with the right mouse button then look in the bottom left part of the interface in the link and materials area it
should say something like OB:Mesh-node, just select this and remove the -node from the name, then select any other meshes in
the scene and do the same.
If one of your meshes is hidden due to overlapping meshes you may want to switch to wireframe view, press the Z key to
toggle between solid and wireframe views.
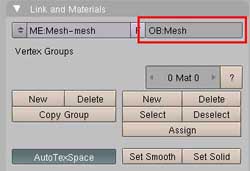
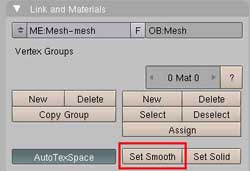
The quick fix for the smoothing groups is to just use the set smooth button,
this is just a button at the bottom of the link and materials section. Select your mesh and click the button, this is just an
overall smoothing that isn't ideal for everything but should give a reasonable result,
If an overall smoothing is not going to give you suitable results there is a work around method to fix this, from what I have read
Blender does not have proper smoothing group support, but by adding splits you can get a similar result, its not as nice as a proper
solution but does not appear to have any noticable issues doing it this way.
Switch to edit mode (tab keyboard shortcut), then change to face sub object selection.

Then select a face with the right mouse button in an area that needs its own smoothing group, then press SHIFT + CTRL + ALT + F
this will bring up a box with a threshold value,
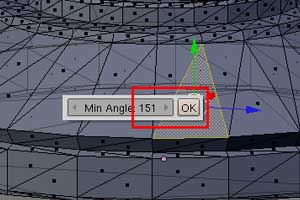
Use this to select all the faces you want in the smoothing group, with a high number the tool will only select faces that are of a low
angle against the current poly, any polys that are at a large angle to the current selection will be ignored, making this an ideal selection tool
for this task. Set the threshold value high and if you don't get the selection you were after try again with a lower value.
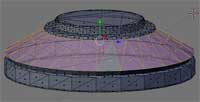
When you have the correct selection, press Y to make a split, this is now your selection group, repeat this process for all the other areas
of the mesh as needed.
If you switch back to object mode you should be able to clearly see the result of the splits.
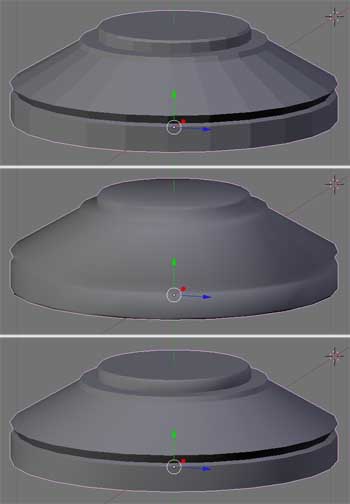
Just incase you are unfamiliar with smoothing groups and none of this is making sence hopefully this image will help,
here is an image showing 3 versions of the note, top no smoothing groups, middle whole object smooted, bottom manually setup
smoothing groups, you should clearly see the model with the correct smoothing groups has better shading that defines the shape better.
If you want to undo any of these splits either reload the file or just select all the model parts you want to rejoin press W then click remove doubles.
NOTE: Other selection methods used in Blender that may be of use
Press B to enable a drag selection box.
Press B twice in a row enables a paint selection mode.
Holding CTRL also gives the option of a lasso style selection.
Pressing A will deselect any current selections, if nothing is selected it will select everything.
Holding alt while doing a selection will deselect.
Shift can be used to make multiple selections.
In some areas you may also want to use the solid buttons in areas where you don't want smooth edges. This is usefull if your note has a flat
base you could just set these areas to solid instead of making a split.
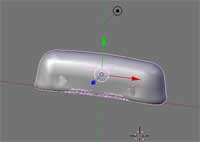
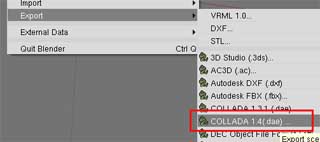
Once the mesh names and smoothing have been fixed just go to file export and select collada 1.4 and use the file browser
to set a folder and filename.
Note: you have to set a filename, if you don't the program will just give you an export error rather than just defaulting to
a default name.
The export settings I use I have not confirmed are optimal, but they work,
Then click export and close.
NOTE: if you recieve an error on export the main things to double check, python 2.5.4 is installed properly, you specified
a filename when picking a save location and uv image mats is enabled.
[ BACK TO TOP ]
This part is just a case of getting the textures ready for game, first make sure all your textures are in png format.
For notes, the filename system is notetex_a - notetex_e for each of the 5 colours, star notes use startex_a - d,
drum textures currently share the standard notetex files, and the bass note uses the file opentex.png
Bass note and fret button textures are also unsupported at the moment, will update with information on these when supported.
[ BACK TO TOP ]
Now hopefully at this stage you will have a folder with all your dae's and pngs all ready to go, copy your files into your theme
of choice, for testing I use the megalight gh3 theme as this is already setup to use 3d notes and frets, if you are copying
your content into a 2d based theme you will have to enable 3d notes manually.
To do this open up the theme.ini inside the theme you want to use and use these lines to enable the settings you want to use.
| twoDnote = False |
Enable 3D notes |
| twoDkeys = False |
Enable 3D fret buttons |
| threeDspin = False |
Disable 360 rotation applied to 3D star notes |
Additional note settings that can be adjusted in the theme ini at the moment is note rotation
| noterotdegrees = x |
rotation amount x=number |
| noterot1 = x |
amount of times to apply rotation value |
| noterot2 = x |
0 = flat, 2= double rotation value |
| noterot3 = x |
accepts positive and negative values |
| noterot4 = x |
|
| noterot5 = x |
|
Now is the point where you take a deep breath and load a song and hope what you see is what u were expecting to see.
NOTE: If FoFix crashes key things to check for, did you unassign the texture from the note in Max before exporting and did you correct
the mesh names in blender before exporting the second time.

All of my FoF downloads can be found [ HERE ]
[ BACK TO TOP ]
|
|