Welcome to my fof note tutorial, I have split the tutorials into 2 sections, this part covers
creating the content itself, the second half covers exporting the finished content into fofix.
If you already have your content ready then you may want to skip ahead to
Tutorial 2.
This tutorial is aimed at Max users, specifically 2009 SP1, other versions will work but results
may vary, and the tutorial will require a certain level of knowledge of the software.
[ BACK TO TOP ]
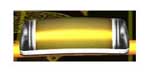
The starting point is to gather your reference, google images usually does the job.
Once you have found a suitable image, crop it as needed and save, take note of your
document resolution as you will need to know this
in this tutorial i will run through making some rb2 style notes so i've found my image
and put it into a document 256 x 128 pixels and saved out as a png
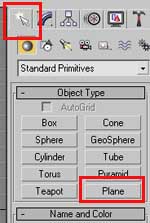
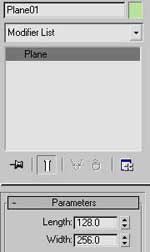
Load up max and make a plane and set the plane length and width to match your image, in my case I will pick
either 256 x 128 or 2.56 x 1.28 depending on the scale I want to work to, at this
point it doesn't really matter, but its best to work to a scale that does not require a huge amount of zooming in from the default view
as this can lead to camera clipping issues in the perspective viewport.
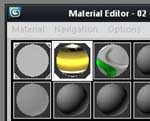
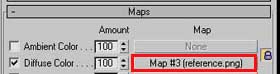
Open up material editor (m keyboard shortcut) and import your reference image into the diffuse slot of an
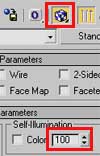
unused material, increase the self illumination to 100 and tick the show texture in
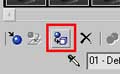
viewport button and apply the material to the plane, by either dragging or clicking the apply material to selection button.
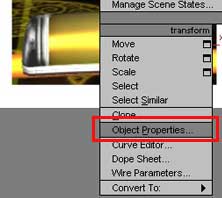
Now this is done, right click on the plane and select object properties, inside the
dialogue box, tick backface cull and untick show frozen in gray, this will allow you
to freeze the reference image so we can work infront of it without having to worry about
accidently adjusting the plane, backface cull also means we can rotate around the object
to see it fully without the plane obstructing the view from the other side
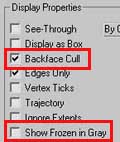
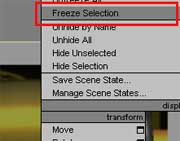
Once the plane it setup, use the layers dialogue to freeze the object, or just right click
the object and select freeze selection.
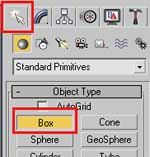
Now we are ready to start modeling, select a primative object that best suits the basic shape
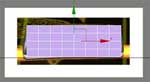
of the note you want to create, for mine I decided to work from a box, adjust
the segments to a value that you feel gives you a good base to work from, here I have decided
to go fairly high as I have a good idea what adjustments I want to make and how many polys I will need to do this, but if
I was unsure I would start with less segments and add detail as I needed it.
[ BACK TO TOP ]
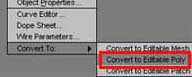
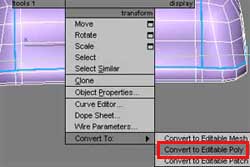
Convert the box to a editable poly by right clicking and selecting convert to editable poly
then we can use the sub object modes to adjust the verts and edges as needed to get the basic
shape
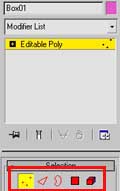
For a shape like this only basic modeling techniques are required, if you are new to the program best check for some youtube videos on the subject,
it should not take to long to pickup, with some simple moving and scaling of verts you should be able to get the basic shape you are after.
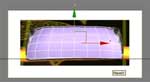
Keep working on the shape, following the reference as closely as possible, in this case the
reference image is tilted forward so i make sure angle snap is enabled (a keyboard shortcut), this means you can rotate in steps making it
easy to realign, and rotate forward to a close angle to match the reference angle and see how close it looks, it is recommended to tilt
back before editing unless you are comfortable with switching coordinate systems to make sure you don't accidently skew the model.
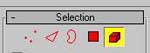
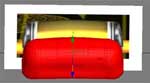
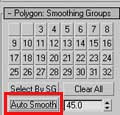
Once you are happy with the shape, go to the select element sub object mode and click auto smooth
to remove any unwanted edges on the model surface
Now the base model is in the correct shape we can move onto the unwrapping, add the unwrap uvw
moddifier to the model
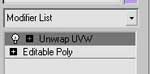
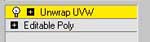
Click the modifer name and it should turn yellow, now the way i like to work is to draw out my
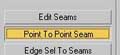
seams with the point to point seam option, to make this easier untick show map seam, now click
the point to point seam button and click along the vertices you want to cut along, the seams
will show up as blue
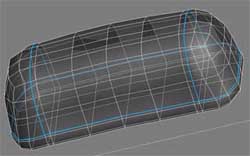
This is what my model looked like after adding the seams where i wanted, the seams are places
in areas that i believe will give me a nice distortion free unwrap without any noticable seams
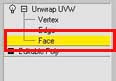
The reason i make these seams is to allow me to easily select sections of the model i want to unwrap,
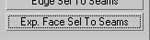
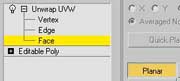
switch to face mode then select any poly on the model and click the exp face sel to seams, this
will then highlight one of the sections of the model
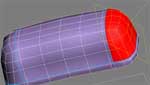
Apply a suitable unwrap gizmo to the section, for this model i will make just making use of the planar
gizmo as this will give suitable results for this kind of model, click best align to let the
program work out the best angle for the gizmo to work from, then click on planar again to deactivate
the gizmo. If you click the large edit button you can now see your uv's
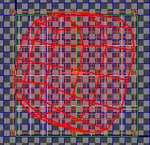
You need to repeat this process for the rest of the sections, select a poly in another section, click
expand selection, use planar and best align and so on.
Once this has been done in the edit window make sure select element is ticked and move your
uv elements away from eachother so they are not overlapping and it should look something like this
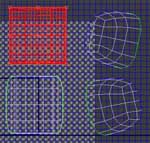
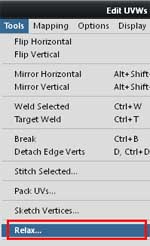
Now this is only the first step to unwrapping, next we need to minimize the distortion of the mapping
and the easy way to do this is with the relax tool, select from the tools menu
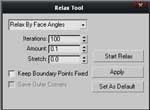
Change the relax mode to relax by face angles (the top option) and click start relax, this should
flatten the uvs of the selected element, if you get bad results experiment with the different modes
and values, do this process for each element of your model and hopefully you end up with a result
similar to this
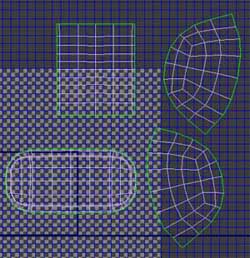
Depending on the complexity of the model the relax process can cause some verts to overlap and collapse
into themselves, in this case it means you will probably have to manually adjust the verts yourself
and will need to refer to a more in depth tutorial on this process.
The next thing we can do to check what adjustments still need to be made is to enable the show
edge distortion mode from the display menu.
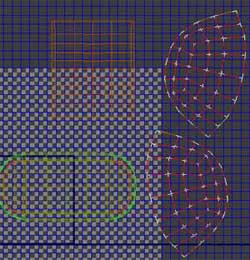
Green is good, red means to compressed and red with white lines means to stretched, we can use
this as a guide to make further adjustments to our uvs
In this case some simple scaling managed to get everything looking good
The next step is to pack the uvs into the work area, this is the blue
square in the background, select all your elements and then scale them together down to a size where
they will all fit inside this square, then put things together in an optimised manner to get everything
inside the area without shrinking the elements any more than needed.
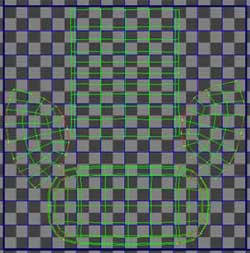
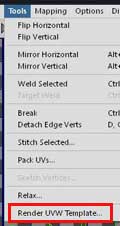
Once everything is in place we are ready to export a template to use as a guide while making the
texture. go to the tools menu and select the bottom option, render uvw template
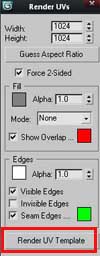
In the dialogue box select the resolution you want, in this case im leaving at the default 1024x1024
as this is plenty for a note, possibility to high but things can always be scaled down later
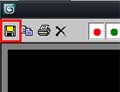
click render then click the disk button in the new window to save the template in whatever format
you like
Once this is done close all the windows to get back to the main max viewport, then right click the
mesh and select convert to editable poly to collapse the stack and bake all the uv mapping information
into the model.
[ BACK TO TOP ]
Now it is time to start working on the texture, open your uv template into photoshop of image editor
of choice, now you have a flattened version of the 3d model that you can paint on
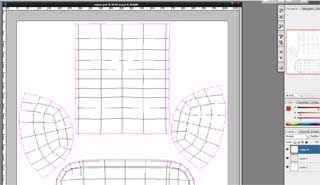
I won't go into detail on how to use photoshop but go ahead and make your texture in whatever method you
are familiar with.
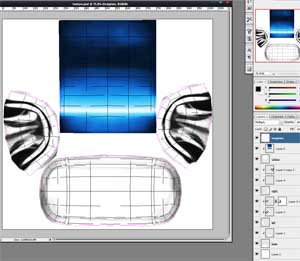
Hide the template lines and save out as a png, we will then load this into max to check the results
on the model itself, then come back to photoshop to make adjustments as needed
In max open the material editor and load in your newly created texture into a empty material slot
just like we did earlier when doing the reference plane.
Now apply the texture to the model and you will be able to see how your current texture is looking
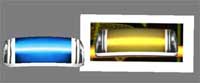
As we can see here, the basic idea is right but there are a few areas that will need improving, so
switch back to photoshop and make your adjustments,
Repeat this process untill you are happy with the results
at this point other techniques can be used such as texture projection with programs such as zbrush
or using a application that support painting directly onto the 3d model like bodypaint, personally
i like to mix some zbrush projections in with my texture as this can get great results far quicker
than tweaking in photoshop, but zbrush has so many complications covering that would require a
whole tutorial of its own
You may find after updating your texture, Max is still displaying the old version, you can force
a refresh by going to the material editor, clicking on the diffuse map, then clicking the reload
button
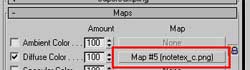
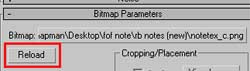
Once the texture is finished we hopefully have something that looks fairly close to the original
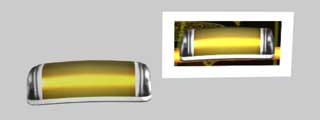
Once this is done, it would be a good time to create the colour variations.

[ BACK TO TOP ]
Once you are at this stage your content should be pretty much ready for export. So it is time to move
onto the second tutorial that covers the exporting process.
[ Tutorial 2 ]
[ BACK TO TOP ]
|
|