After spending many hours uvmapping in Max I decided to look for some alternative applications that may provide some tools for speeding up the
process, this is when I discovered UVLayout, at first glance the program looks quite dated by current standards, but after spending some time
with the program it has some great features and I find myself using it for any complex unwrapping I need to do.
The relax tools in Max have a habbit of collapsing verts and can require a lot of manual tweaking, uvlayout seems to keep these issues to a minimum,
and the symmetry option is a great help, allowing you to instantly mirror uv changes over a specified symmetry line.
This tutorial covers the basic process that will allow anyone new to the program to get some quick results.
[ BACK TO TOP ]
Here is a quick reference list of the main controls you will want to be familiar with.
| INPUT |
ACTION |
| Left Mouse Button |
Rotate View |
| Middle Mouse Button |
Pan view |
| Right Mouse Button |
Zoom |
| C |
Add seam to edge loop |
| Backspace |
Remove seam |
| Enter |
Seperate Mesh along seams |
| Shift + S |
Split partial seam |
| D |
Drop - Send mesh to ed space |
| Shift + D |
Undrop - Send to uv space |
| Shift + F |
Flatten / relax |
| f |
Relax |
| S |
Symmetry |
| B |
Paint Relax |
| CTRL + Middle Mouse |
Move vert |
| CTRL + Right Mouse |
Move vert |
| Space + Left Mouse |
Rotate uvs |
| Space + Middle Mouse |
Move uvs |
| Space + Right Mouse |
Scale uvs |
| 1 |
Uv Space |
| 2 |
Edit Space |
| 3 |
3D Space |
| + |
Increase brush size |
| - |
Decrease brush size |
| p |
Pin vert |
| t |
3D space texture cycle |
| [ or ] |
Pack uvs |
[ BACK TO TOP ]
Export mesh as an obj, in Max 2009 you can use the zbrush obj settings and this will be fine.
In uvlayout click load and find your obj, pick the type of mesh, and if you want to load in exsisting
uvw mapping or start clean.
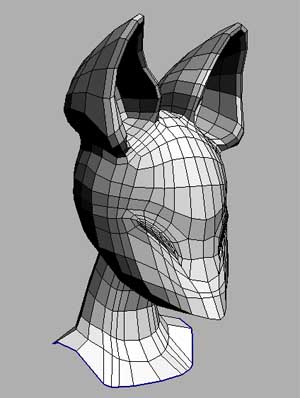
For this example I have quite a simple head mesh I need to unwrap, this is what I have on screen after loading in the obj.
[ BACK TO TOP ]
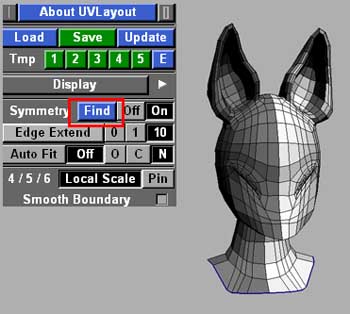
One of the great tools in uvlayout is the symmetry option, if you are working on a symmetrical mesh click the find symmetry button
Then select the edge loop that runs along your mirror point, press space to confirm the selection.
[ BACK TO TOP ]
The next step is to setup your seams, draw your seams by moving the mouse over an edge and pressing c
To remove seams use the backspace key
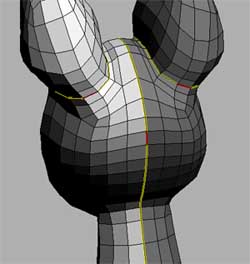
Once you have your seams where you want them, with the mouse cursor over the mesh press the enter key and it
will seperate the mesh along the seam. If the mesh does not seem to seperate correctly (turns red) there may have been a
problem with the seam so just undo and recheck your seams before trying again.
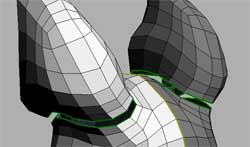
Once all the parts of the mesh are in seperate elements, you may need to make extra splits to unwrap the element, a good
example here is when doing a head, you may have set your seam along the neck to seperate the head and body, but you will
likely want another seam running up the back of the head, for these seams that only split part of the element rather than
seperating it completely you press shift + s, this should seperate the edges along that seam rather than trying to seperate
a group of polys into their own element.
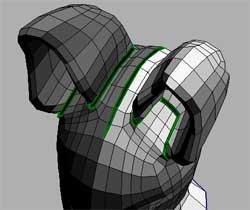
Once all of your seams / splits are complete, you can send any of these mesh parts into the uv editing section of the program
with the d key.
[ BACK TO TOP ]
The program itself is split into 3 main sections, the first for setting up the seams, the second for flattening and editing the uvs
and the third for checking the results.
Once all the parts of the mesh have been dropped into the uv space the first part of the program will be empty, and will only be
needed again if you are not happy with your seams and you undrop (shift + d) an element in the uv space back to the seam editor.
Switch to the uv space by clicking the uv button in the display section.
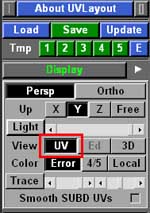
Press Shift + f to unwrap a dropped model element, this will start by doing a pelt type flattening of the uvs, then press space to move onto the second
step where it will start to relax the uvs back into a natural shape, press space again when you are happy with the results.
Once this is done you can use the s key to mirror the uvs over the symmetry line that was specified at the start.
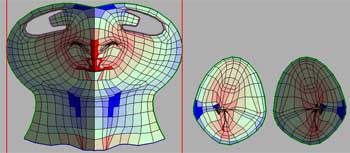
Repeat the progress for all the parts of your model. This is how my head is looking at the moment, the red areas show compression while blue show stretch
so these are the areas where we will be facing distortion issues, in the red areas there is likely to be overlapped areas as well that I will manually fix.
[ BACK TO TOP ]
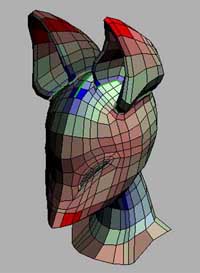
At this point I have a reasonable unwrap but with some key problem areas that could use some work, the top of the ears, and nose area will certainly cause
distortion issues, and are in very noticable areas so I really need to fix the distortion completely or if not possible, shift it into less noticable areas.
While the program seems to get very good results, it is likely you will still need to do some manual tweaking, you have paint
relax specific sections of the mesh just by holding b, use + and - to control the brush size for this tool, and manually adjust verts with Ctrl + Right Mouse, once you have made your
adjustments press s again to mirror the updates if needed.
You can also make use of shift + Right Mouse for a nudge type paint adjustment of verts, use + and - to adjust the brush size.
Or use Shift + Ctrl + Right Mouse for a soft selection type mode to shift groups of verts.
Another usefull option that can help solve problem areas is the pin option, with this you can lock verts / faces that you want to remain in place while editing,
to pin a vert just use the p key, if you want to pin based on a face selection use the g key to select faces, then press g again over a blank
area followed by p the selected faces should now show green dots around them to show they are now pinned.
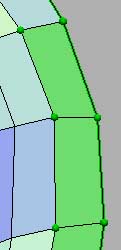
To unpin just use p to do each vert seperatly, or to unpin based on face selection press g once again over a blank area, the press Shift + p.
NOTE: Pressing g on the same face twice will select all the faces in that element, press shift + g twice to deselect everything
If you are finding you are not getting the results you want, you may need to undrop the object and adjust the seams by switching
back to the editor space in the display menu.
[ BACK TO TOP ]
Once you have got past the tweaking stage use the display buttons to switch to the 3D display mode to check for distortion on
your model.
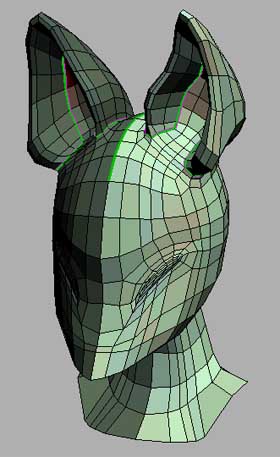
You can use the t key to cycle through a few textures that can help display your distortion better, such as a
checker pattern.
Here I can see I have managed to get rid of most of the problem areas, there are still a few strong red areas that I have hidden inside the ear as this area
will be hard to see so I don't think this will cause any trouble.
When you are happy with the results, you can save out your mesh as a new obj that is ready to reimport into Max, or
other obj compatible application. One final step you may want to do before exporting is to let the program pack your uvs for you by pressing the [ or
] key.
[ BACK TO TOP ]
|
|