3DS MAX: FOREARM TWIST
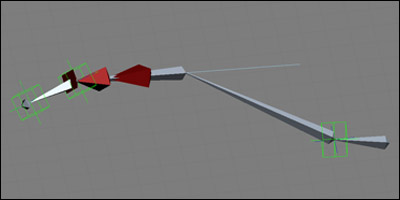
|
This is a 3DS Max forearm twist bone setup I was taught at uni as I needed it for my third year film project after seeing the results of using
a rig without it in my second year. The method does have one known issue, rotating the palm exactly 90 degrees causes the twist bones to glitch,
but 89 or 91 are ok, so just have to avoid exact 90 degree positions.
I start by maximising my viewport (ctrl w) and switching to top view (t) then go to the create > systems tab and select bones.
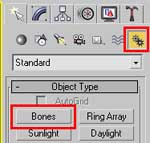
In this case example im goign to create bones for the clavicle, upper arm, and forearm, then right click to end chain,
then create a palm bone and end. Be sure to put a slight bend in the arm bones to ensure they will bend in the right direction if
using an IK setup.
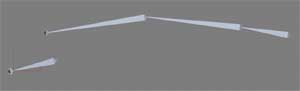
Now select the forearm bone and the nub and shift drag to make a duplicate of these 2 bones.
Then go to the animation file menu and select bone tools, this will bring up a new box with some usefull bone specific tools, the one we want
to use is refine.
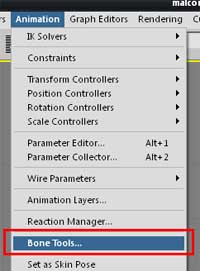
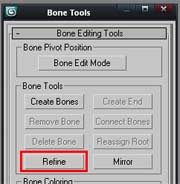
Select the refine option and cut the new duplicated forearm bone into thirds with 2 clicks where you want to make the cuts, this will turn the
forearm into 3 seperate bones.
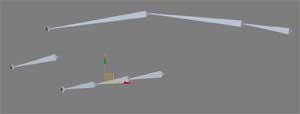
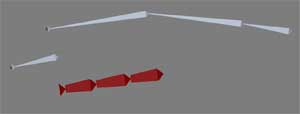
These new bones will become the twist bones and to make them easier to work with it helps to adjust the size and taper settings so they are easy to
see and select, you may also want to change the bone colour as well.
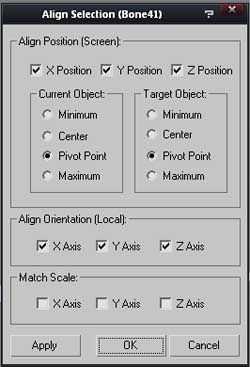
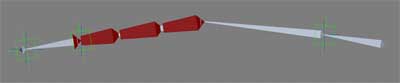
Once this is done we want to get the bones in the right place so use the align tool, make sure position and orientation x z y are all ticked, then
align the palm bone to the arm nub, then align the first twist bone to the forearm.
The result should look something like this

Now all the bones are in place and aligned as we want them we can move onto the next stage of prepairing the twist setup. For this example I will
add some IK chains and dummys as example controllers.
Select the clavicle, then go to the animation file menu > IK solvers select HI solver, then select the upper arm bone, repeat this process to all add
an IK chain from the upper arm to the forearm nub, and im also going to add a third chain between the palm bone and the palm nub, this part is all optional
and just a setup to easily test the results of the arm setup.
Im also going to create three point helpers, tick the box option on the point helper to make it easier to see. Then align these to the upper arm bone, the forearm nub
and palm nub, this should put the helpers in the same place as the ik chain goals.
Next we can delete the first twist bone as this is not needed, I only used it to easily align the twist bones with the forearm, but now we can get rid of it.
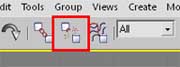
Then select what was the third twist bone in the chain (the one before the nub) and click the unlink selection button.
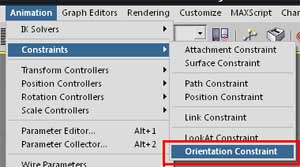
Now select the second twist bone and orientation constrain it to the forearm bone, animation file menu > constraints > orientation constraint.
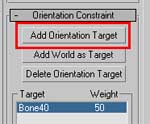
Then click the add orientation target button and select the third twist bone again, this will create a 50/50 link between these two bones.
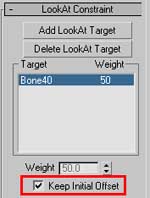
Now select twist bone 3 and select a lookat constraint from the file menu and link it to the forearm bone. If your bone jumps into an odd position
you may need to tick the keep initial offset button.
Next change the upnode to the palm bone, untick the world box, then click the button next to it and select your palm bone.
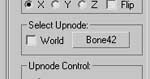
Usually I would name each bone properly to help identify the bones better as names like bone42 wouldn't do me any favours if I planned on using
this rig.
To finish off, we just need to link a few things together, use the select and link tool to link the two twist bones to the forearm. Then link the
palm bone to the wrist controller / point helper.
Then link the IK goals to their overlapping point helper, and then link the palm point helper to the twist helper.
Now you can hide your IK as we don't need to touch this anymore, personally I'd create a new layer for all the IK objects and just hide the layer.
Now if you select the wrist helper, switch to local rotation you should see the twist bones working, with a falloff effect on the rotation, so when you
skin your mesh to the bones you can skin weight between the two twist bones and forearm to get a smooth rotation on the arm.
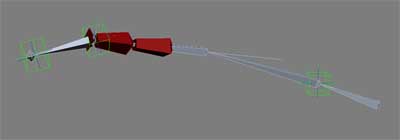
Currently the only example I have to show this setup on a skinned character is this test video from an in progress short film project and so far there have been
no issues with the arms that have lead to any trouble beyond the 90 degree glitch.
|
|
|