3DS MAX: FOOT ROLL
|
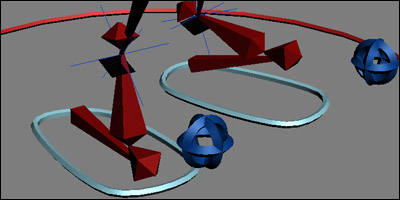
Another 3DS Max rigging tutorial, this time showing the process of setting up a foot roll system. Over the three years at uni we were taught a new method to do this
each year, this is the most recent method we were shown and also the easiest without missing out on any features so is my personal favourite.
In this example I will be setting up an IK leg
To start switch to the left view (l), then turn on snap (s), then right click on the snap button to bring up the settings and select grid points,
disable any other options.
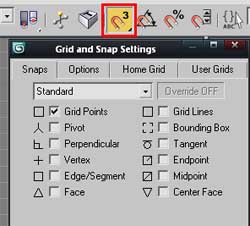
Now close the dialogue box and maximize the left view (alt w)
Go to the create > systems tab and select bones.
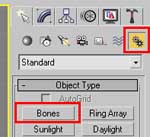
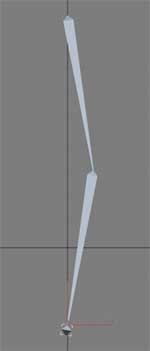
Then make 2 leg bones and end the chain with right click. Make sure to include a bend so the IK will bend in the knee in the right direction.
You should have something like looks like this.
Next make the foot bones, (keeping in the left view) for the foot we start at the back of the foot along the ground, this is where your heel pivot will be, take it to the end
of the tip toes, then double back to add a pivot where the ball of the foot would be, then a third bone to the ankle, where the leg nub bone is so the foot
is aligned to the leg.
To make it easy to see I have coloured the foot bones and numbered the positions where I click to make this bone chain.
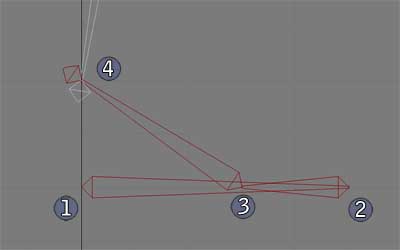
Now all the bones are in the right place we need to set things up, first make an IK chain for the leg, select the top leg bone, in the animation file menu
select IK solvers then select HI Solver then click the leg nub.
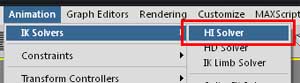
Then link the IK goal to the foot nub.

If you rotate any of the foot bones you should now see the leg moving along with it.
Next we will want to setup a dummy or controller that will store our foot roll slider, to make things simple I will just make a single foot controller that can
be used to potition the foot and store the slider.
Switch to top view and go to the create shapes menu and make a rectangle around the foot.
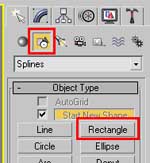
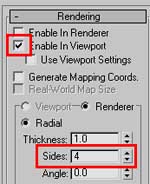
In the rectangle settings click on the rendering rollout and tick enable in viewport, then drop the number of sides down to 3 or 4, if you want to shape the controller
you may want to convert to an editable spline and change the verts to smooth curves, this can make it easier to work with depending on the shape of your models foot.
Now link the flat heel bone to the foot controller. You should be able to move the controller now to position the foot and have the leg bend suitabily.
Next add an attribute holder modifer to the controller, with the controller still selected go to the animation file menu and select parameter editor (Alt 1)
With this we can create the slider for the foot roll.
In the parameter editor make sure the top option under add to type says selected objects current modifer, then set a suitable name, such as Left Foot Roll, and in the range
section set the from value to -60 and to range to 90, values will vary depending on the type of foot you are doing but this is a general range, once this is done click the
Add button to add this new slider to the controllers attribute holder modifer.
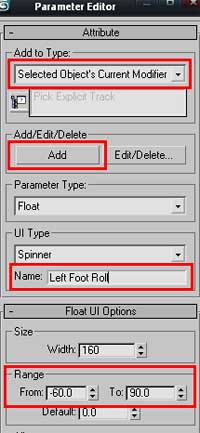
Now the slider is added we can link bone positions with the slider values through the reaction manager, also found in the animation file menu.
Inside reaction manager click the dark plus button (add master) and then click on the foot controller, this will bring up a menu option, select modified objects, then attribute
holder, then custom atrributes, inside this menu you should see your newly created slider, select this to add it to reaction manager.
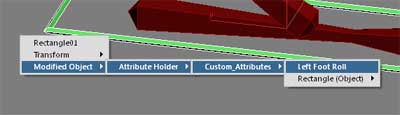
Next we need to add the bones we want to link to the slider, this will be the 3 main foot bones, not the nub. These need to be added into reaction manager in a
specific order to work right add in the order they were created, the flat heel bone first.
Before we start adding the bones into reaction manager we will want to freeze the transform to zero out the rotation values so we can input absolute values rather than
trying to add and subtract rotations with the current rotation values, to do this select the 3 foot bones, then hold alt and right click then select the freeze transform
option, and click ok to confirm.
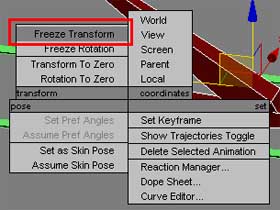
One final step before getting back into reaction manager, we need to confirm what rotation axis we will be working with, change to the rotation tool (e), and switch to local axis
and select a foot bone.
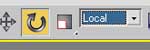
The rotation gizmo will show 3 colours for each axis, if you hover the mouse over one of these colour axis rings in the center of the gizmo a X Y or Z will go from grey to
colour, with this we can see what axis we want to rotate, in my case my bones will be rotating along the blue / Z axis. If you are having trouble seeing the gizmo
you can use the + and - keys to adjust the size.
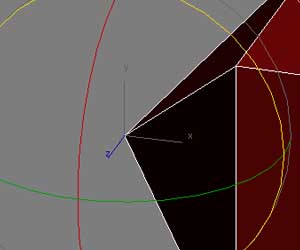
Now we know this click the add slave button in reaction manager, then select the first bone to add, naming your bones will make the following a little clearer,
I would recommend doing this when working with full rigs in reaction manager, names like bone23, bone47 will likely mean nothing to you, I have not named anything
here as this is a rig that will not be used.
If you are not going to be working with the rig but will be passing it on to someone you dislike then maybe you would
prefure not to name your bones.
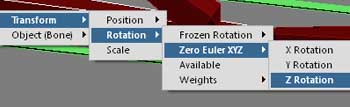
This will again bring up a selection menu, go through the menus Transform >
Rotation > Zero Euler XYZ > Z Rotation and select, if your axis was different to Z then select the correct axis for your setup.
Now repeat this process for the second bone and then the third, this should mean we have the foot control as a master with 3 slaves set to rotate.
Every time a slave is added to reaction manager it creates a new state so in the middle / state section of reaction manager there will be 3 states already listed, we don't want
any of these so click on the state then click the cross / delete button.
Now all the states have been deleted add 4 new ones, click the add state button 4 times, the old states only had 1 slave in, these new states will have
all 3 slaves listed and now we can setup some values for 4 key foot positions.
The first state will be for the on heel position, for the first state double click the value field and enter -60, then on the first bone
set its value to -60
The second state will be for the default flat position, for this we want the state value to be 0, and all the bones to be 0
The third state will be for the ball of foot position, set the state value to 45 and the third bone value to 45
The final position is for being on the toes, set the state value to 90 and the second bone to 90.
Now select the foot controller and adjust the slider to see the results of your slider.
If any of these values seem to extreme then tweak the numbers to a more suitable position. If the bones rotate in the wrong directions you may need to invert the
rotation values by making positive values negative and negative positive.
Once the values are tweaked as needed you now have a functional foot roll system.
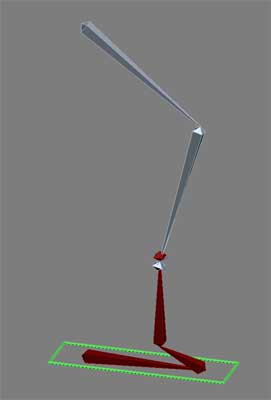
To extend on this it can be convenient to create a physical slider in the viewport to allow easy editing while animating, without needing to select specific controllers
to see the controlls. I will cover this process in another tutorial.
|
|
|